Running a giveaway with a countdown sticker in Instagram Stories is an engaging way to build excitement, reward your audience, and boost engagement. The countdown sticker taps into FOMO (fear of missing out), prompting followers to set a reminder so they won’t miss your announcement. In this step-by-step guide, you’ll learn how to plan your giveaway, design and launch your countdown sticker, set clear rules, select and announce winners, and measure your giveaway’s success.
Planning Your Giveaway and Setting Goals

Before you open Instagram, define the purpose of your giveaway. Are you celebrating a milestone, promoting a new product, or simply rewarding your followers? Establish specific goals—such as gaining 500 new followers, increasing Story views by 30%, or generating user-generated content through entry submissions. Next, choose a prize that aligns with your brand and appeals to your audience. For example, if you run a beauty account, offer a gift set of your best-selling products; if you’re a fitness influencer, give away free access to an online training program. Finally, decide on the giveaway timeline. A countdown sticker works best for giveaways that span 24 to 48 hours—long enough to build anticipation but short enough to maintain momentum.
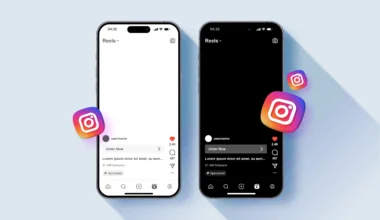
Designing Your Countdown Sticker Story Slide
Once your plan is in place, it’s time to create the Story slide that features your countdown sticker. Open the Instagram camera and upload a background image or video that showcases your prize—consider a clean product shot or a short clip of you unboxing the item. Tap the sticker icon at the top of the screen and choose “Countdown.” Give your countdown a clear name, such as “Giveaway Ends” or “Win the Prize,” so viewers immediately understand its purpose. Set the date and time that the countdown will expire. Customize the sticker’s color to match your brand palette or to contrast with your background for maximum visibility. Position the sticker prominently—ideally in the center or upper third of your slide—so it’s the first element the viewer notices.
Writing Clear Rules and Entry Instructions
A successful giveaway hinges on transparent rules and simple entry steps. On a follow-up Story slide, overlay text with your giveaway guidelines. Include these essentials: how to enter (e.g., “Screenshot this Story and tag us in your Story”), any required actions (such as following your account, liking a recent post, or commenting on a feed post), the deadline (controlled by the countdown sticker), prize details, eligibility requirements (age, location), and when and how the winner will be announced. Keep the text concise and use bullet points or numbered steps to ensure clarity. To maintain aesthetic consistency, use the same font style and color scheme across these rule slides. You may also want to add a “Swipe Up” link (if available) to a full set of terms and conditions on your website or a dedicated landing page.
Launching, Reminding, and Engaging During the Countdown
With your slides ready, publish the countdown Story sequence. Encourage followers to tap the countdown sticker and select “Remind Me” so they receive a push alert when the giveaway closes. To keep excitement high, reshare the countdown Story at strategic intervals—such as halfway through the giveaway or three hours before the end—each time adding a fresh caption like “Last chance!” or “Don’t miss out!” Engage with your audience by replying to Story replies, reposting user entries (with permission), and answering any questions about the giveaway. This active participation not only maintains momentum but also reinforces your brand’s authenticity and responsiveness.
Selecting and Announcing the Winner
When the countdown expires, Instagram will send you a notification if a follower tapped “Remind Me.” Immediately close entry submissions and compile your list of eligible participants according to the rules you set. For fairness, use a random picker tool to select your winner or, if entry required original content, choose based on your predefined judging criteria. Prepare a celebratory Story slide announcing the winner’s username and thanking everyone for participating. Be sure to tag the winner so they receive a notification. If you collected emails or DMs for prize delivery, follow up promptly with the winner to confirm shipping details. Finally, consider posting a recap in a permanent Story Highlight labeled “Giveaways” so new followers can see proof of past winners and upcoming opportunities.
Measuring Results and Iterating for Future Giveaways
After the giveaway concludes, dive into Instagram Insights to evaluate its impact. Compare your follower count before and after the giveaway to assess growth. Analyze Story metrics—views, sticker taps, forwards, and replies—to gauge engagement. Look at how many people tapped “Remind Me” on your countdown sticker, as this indicates genuine interest. If you included a link or swipe-up, track click-through rates to see if the giveaway drove traffic to your website or landing page. Gather these results in a document or in sssinstagram to centralize your performance data. Identify what worked well—such as the type of prize or the timing—and note any challenges, like low participation or confusion over rules. Use these insights to refine your approach for the next countdown sticker giveaway, adjusting entry methods, prize selection, or marketing tactics to drive even better results.
By following these steps—carefully planning your goals, designing an eye-catching countdown sticker, publishing clear rules, engaging your audience throughout the campaign, announcing winners transparently, and analyzing performance—you’ll host a giveaway that both delights your followers and advances your brand objectives. With each iteration, you’ll fine-tune your process, harnessing Instagram’s interactive features to foster deeper connection and sustained growth.